Last time on this ol' Pentium, I was puzzling over how I could be getting a 'CMOS battery failure' message on POST when no battery was visible on the motherboard. A quick trip to VOGONs yielded an answer, though not a particularly heartening one.
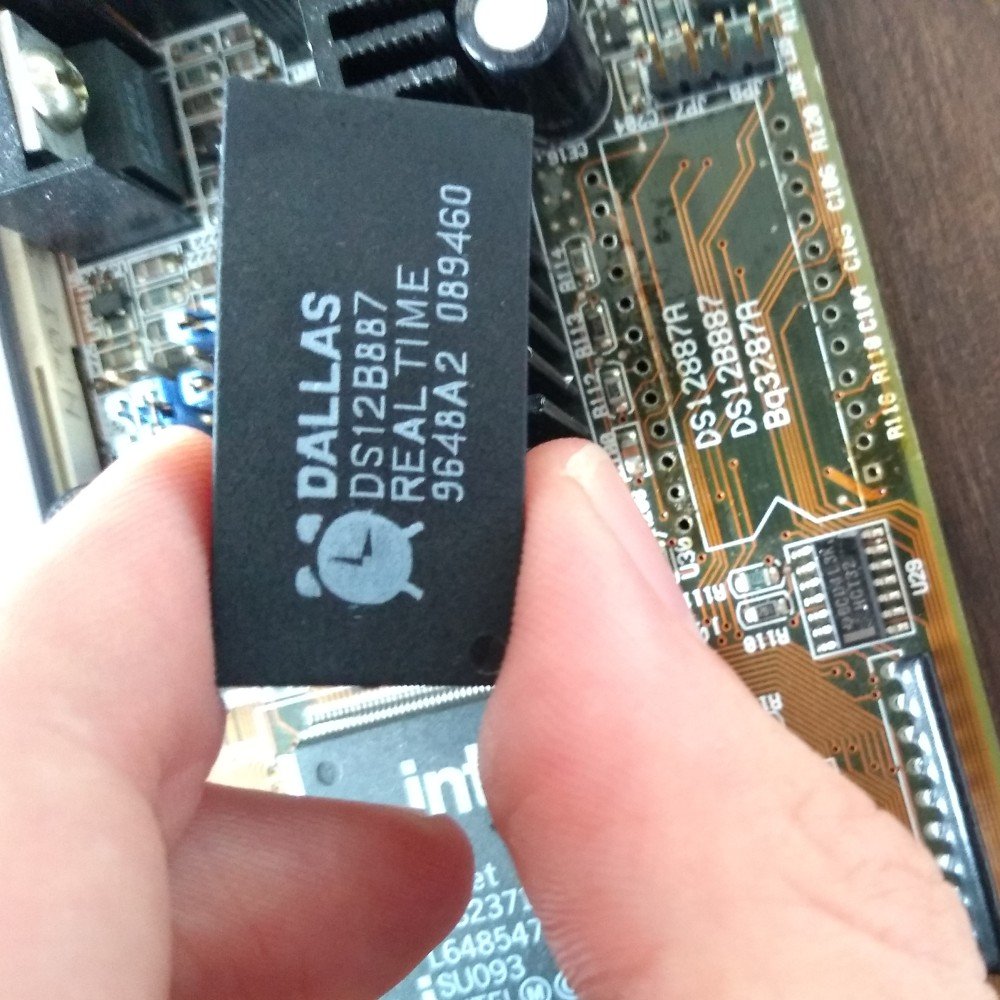
Turns out, intel's chipsets prior to the 430TX didn't incorporate a real-time clock, which is needed to keep track of time while the system is shut off. Thus motherboards of the era used a separate RTC component which, like the CMOS used to store the BIOS configuration, requires a constant source of power. Someone at Dallas Semiconductor realized that by combining an RTC, SRAM and lithium battery all in one package they could save manufacturers both money and board space, leading to a highly successful line of "clock chips" found on nearly every motherboard of the era.
Unfortunately the batteries in Dallas clock chips are not user serviceable. And when I say "not user serviceable" I don't mean that they discourage you from opening them up, I mean that all the internals are encased in nigh-impenetrable resin. If you Google around you'll hear tall tales from Dremel ninjas who cut into the chip's casing, sever the connection to the battery, then solder in wires extending to a remote battery holder. That's all well and good if you're an all-star surgeon, but if, like me, you occassionally spill an entire of mug of coffee into your lap just trying to get it from the table to your lips, you won't be doing anything of the sort.
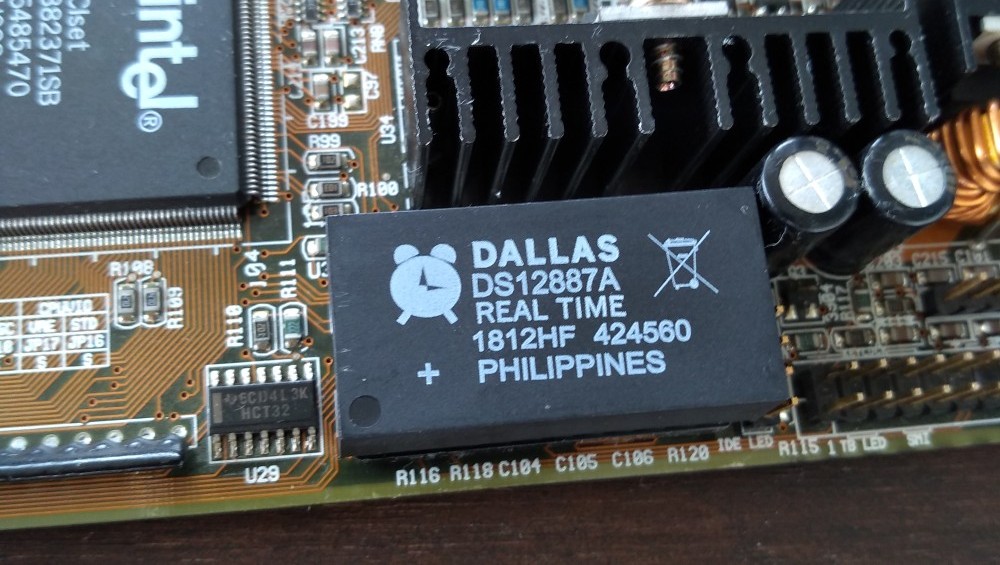
As much as I admire hobbyists going to incredible lengths to hold onto their original clock chips, it's in no way necessary. MAXIM, who purchased Dallas in 2001, still makes compatible replacements which you can purchase them brand new from Mouser for about $10 a pop. And that is precisely what I did. Fresh chip in hand, all I needed was to swap out the old one.
Having a fair bit of soldering experience from resurrecting suicidal, early-90s Macs, I was able to remove the dead RTC with just an iron, a few dabs of flux, a length desoldering braid and a couple of hours hurling obscenities.
After cleaning up through-holes, I popped in a DIP-24 socket so I'd never have to put myself through this again, and dropped in the replacement chip.
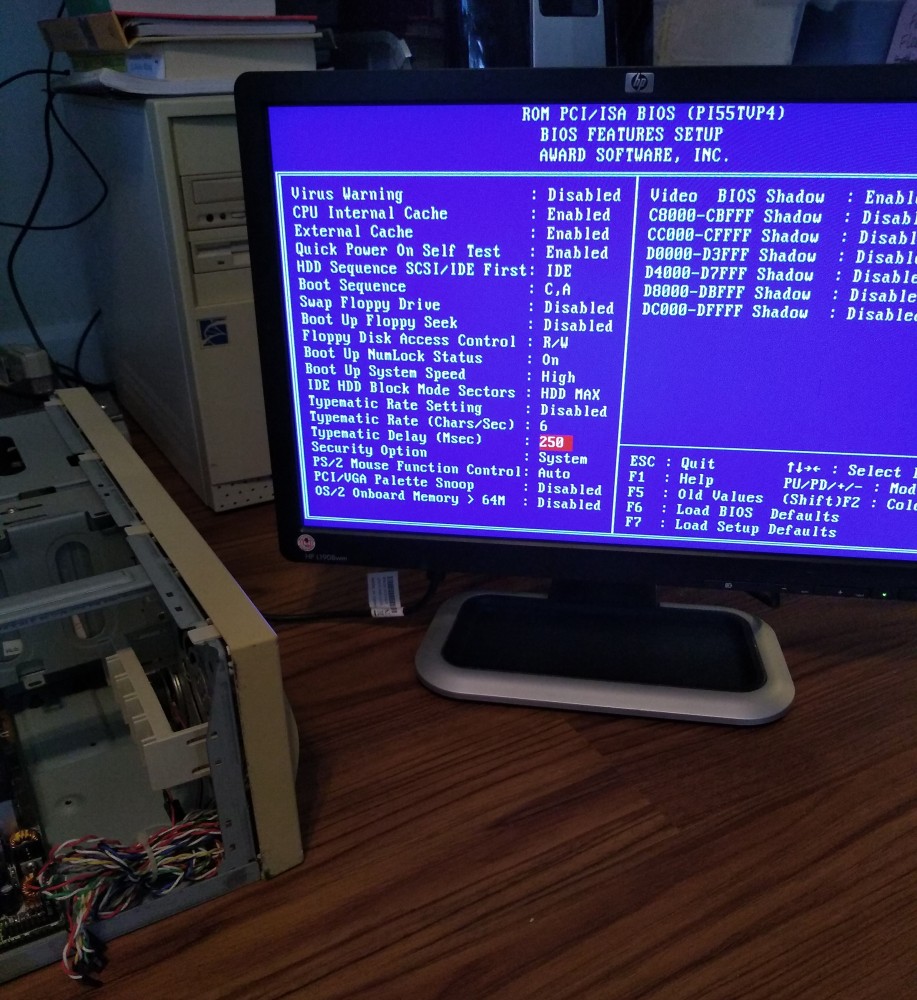
Much to my surprise, er, I mean, as expected, the machine booted straight up and I was able to access, modify and store the BIOS settings without issue. I spied a BIOS update on Asus' support website for the board, which is oddly but thankfully still online, and applied it via a floppy boot disk.
Just a few more additions and she'll be ready to load up DOS and play some TIE Fighter! Tune in next time for a run-down of the components I added and why.
Social


Support
Stay tuned for information on how you can support our blog and podcast.